Table of Contents
Follow these steps in order.
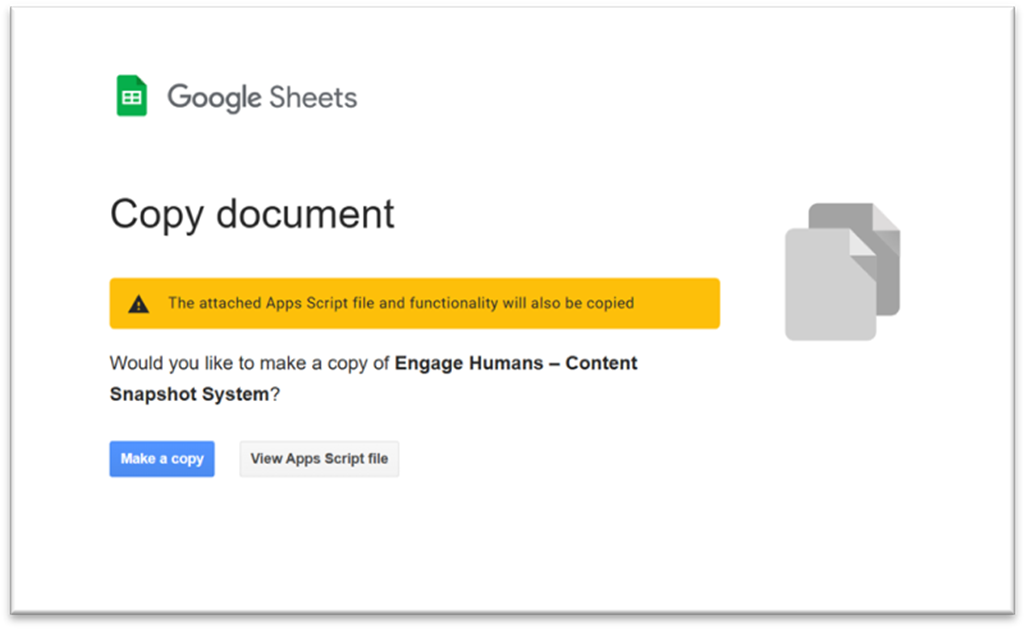
Step 1 — Make a Copy of the Tracker #
Open the link and click Make a copy.
The Sheet opens on the Dashboards tab.
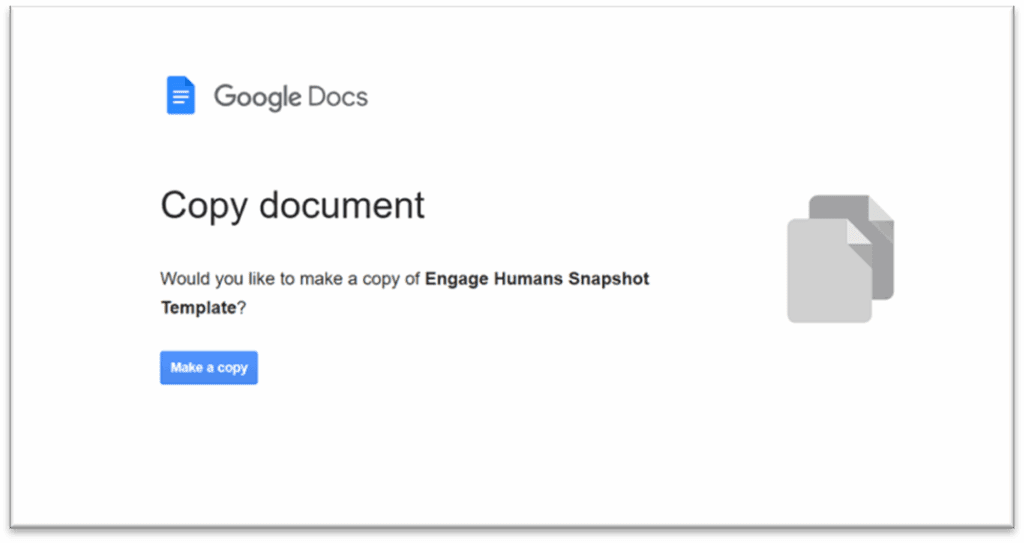
Step 2 — Make a Copy of the Snapshot Template #
Open the template link and click Make a copy.
Step 3 — Create Your Folders #
Create a folder in Drive for:
- The Content Snapshot Tracker (Sheet + Template)
- A subfolder named something like Content Snapshots for generated reports
Step 4 — Add Folder IDs to Config #
In the Sheet, open the Config tab.
- Paste your snapshot folder ID into SnapshotFolderId
- Paste your template Doc ID into SnapshotTemplateDocId
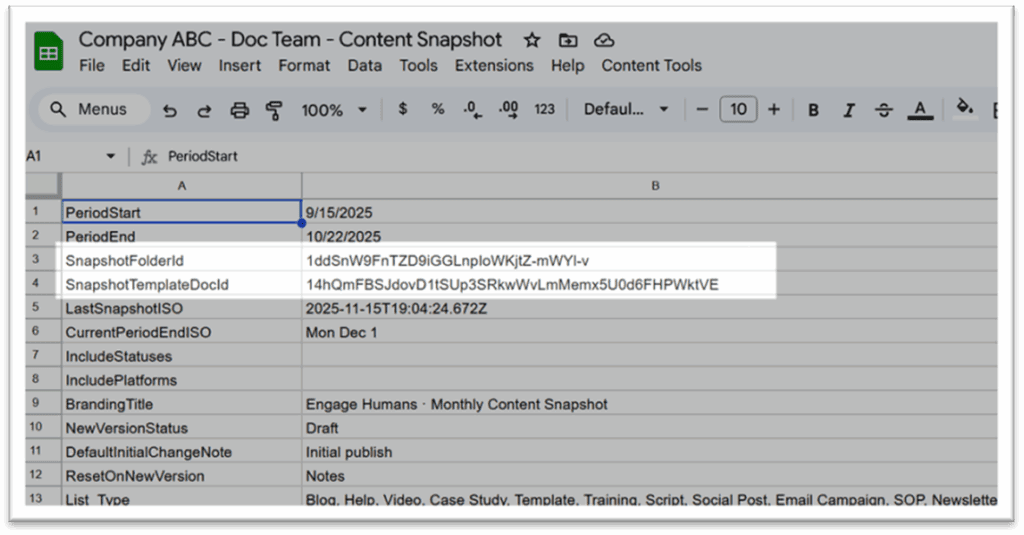
This tells the tool where to save reports and which template to use.
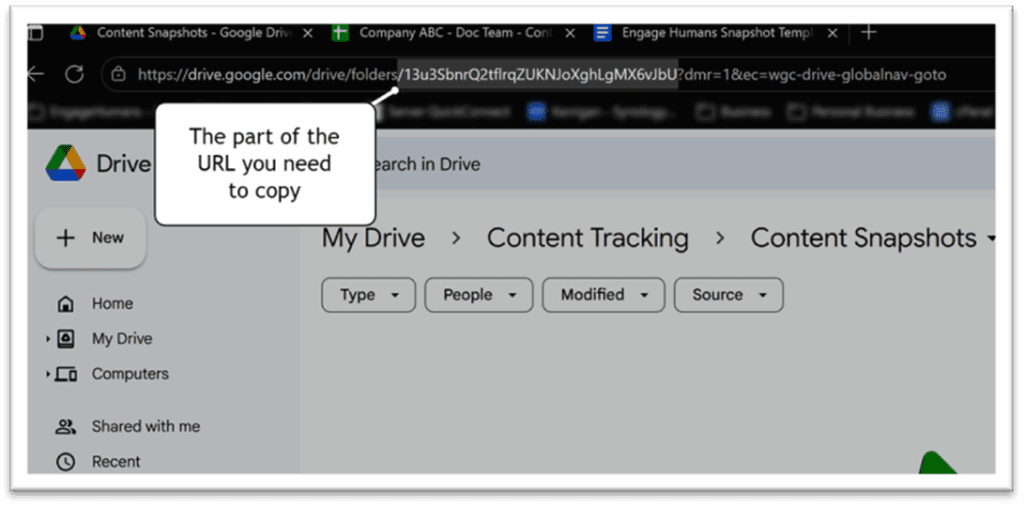
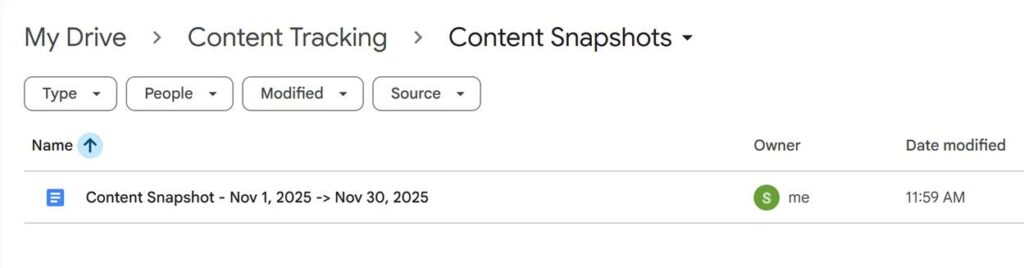
The snapshot reports are saved in this folder.
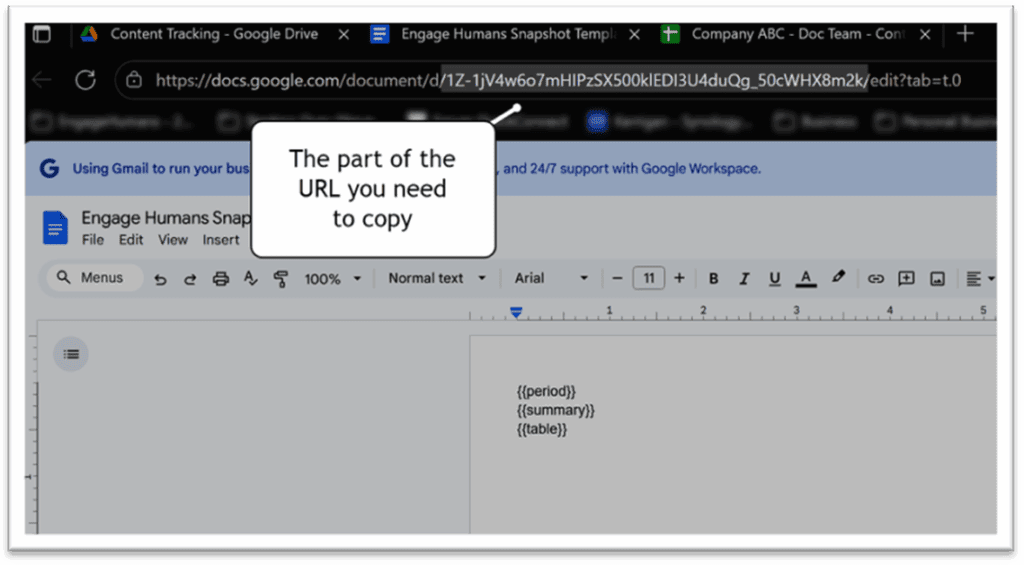
This is the part of the snapshot report template URL you need to add to configuration.
Step 5 — Authorize the Script #
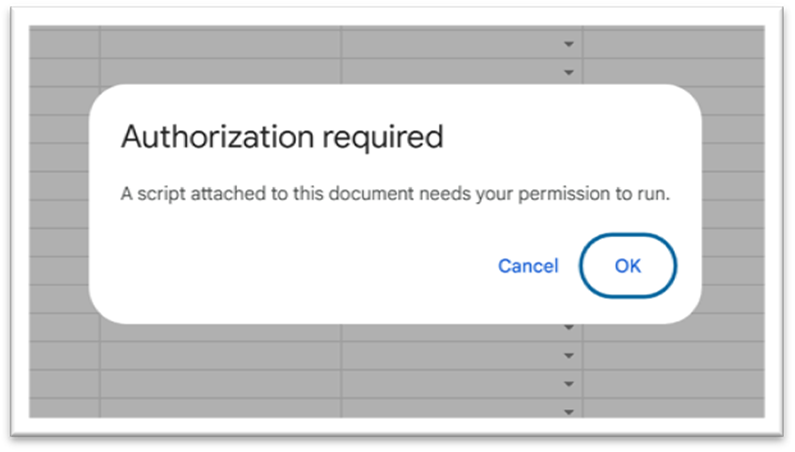
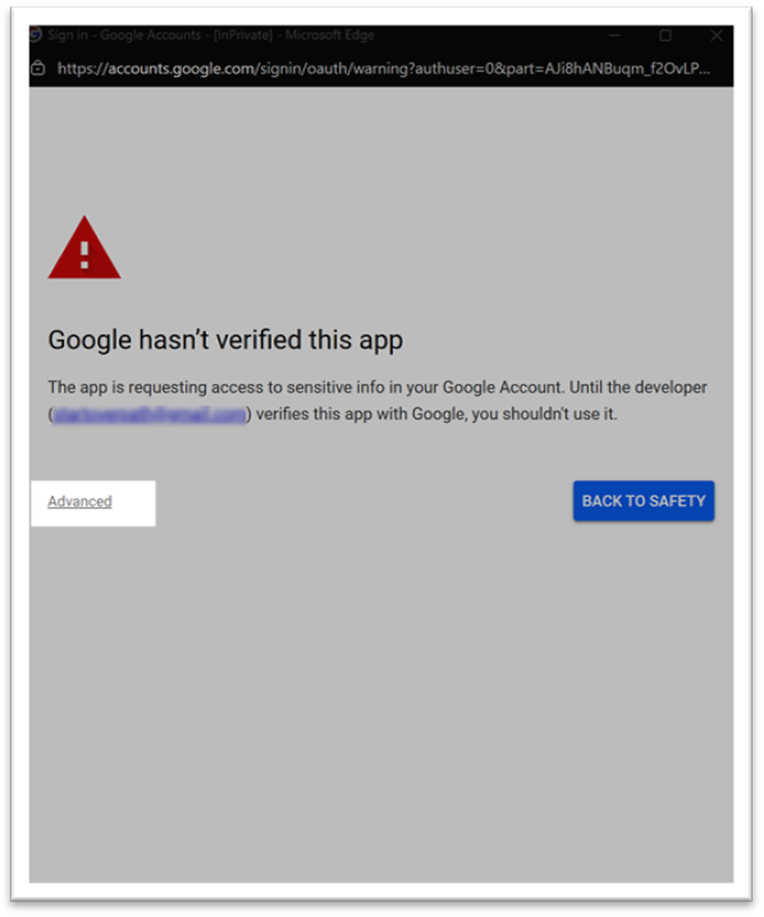
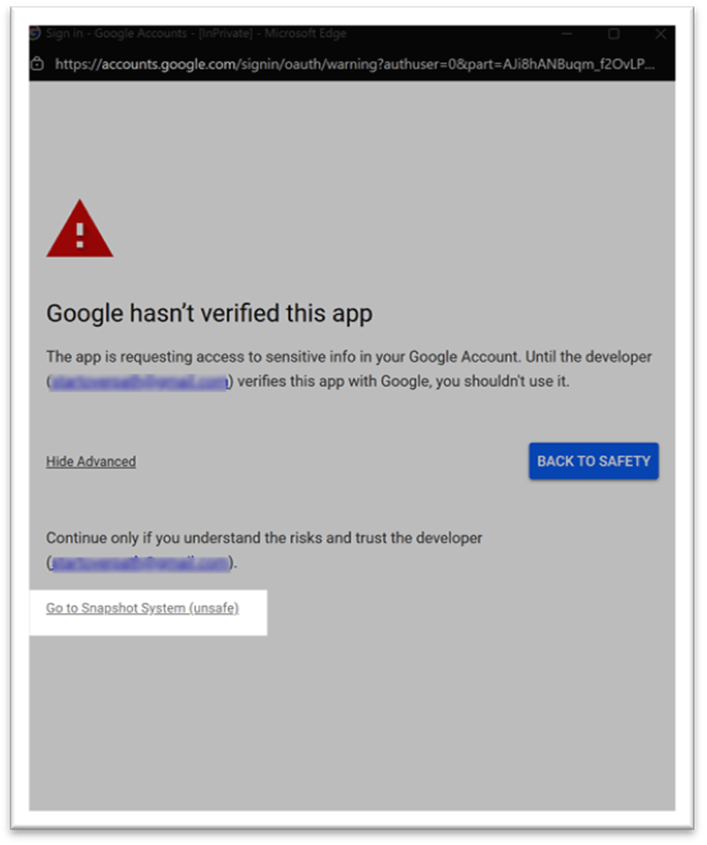
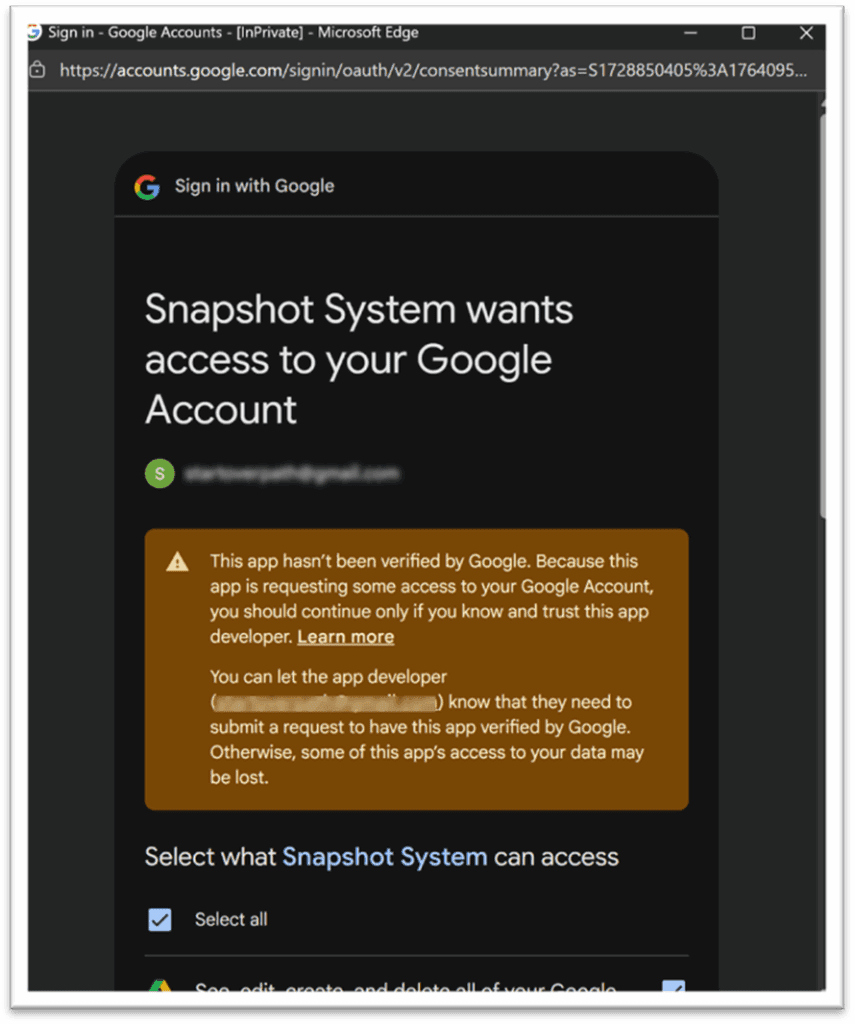
Select Content Tools > Setup / Repair Sheet. You will see a Google authorization prompt.
Confirm all screens:
- Authorization Required → OK
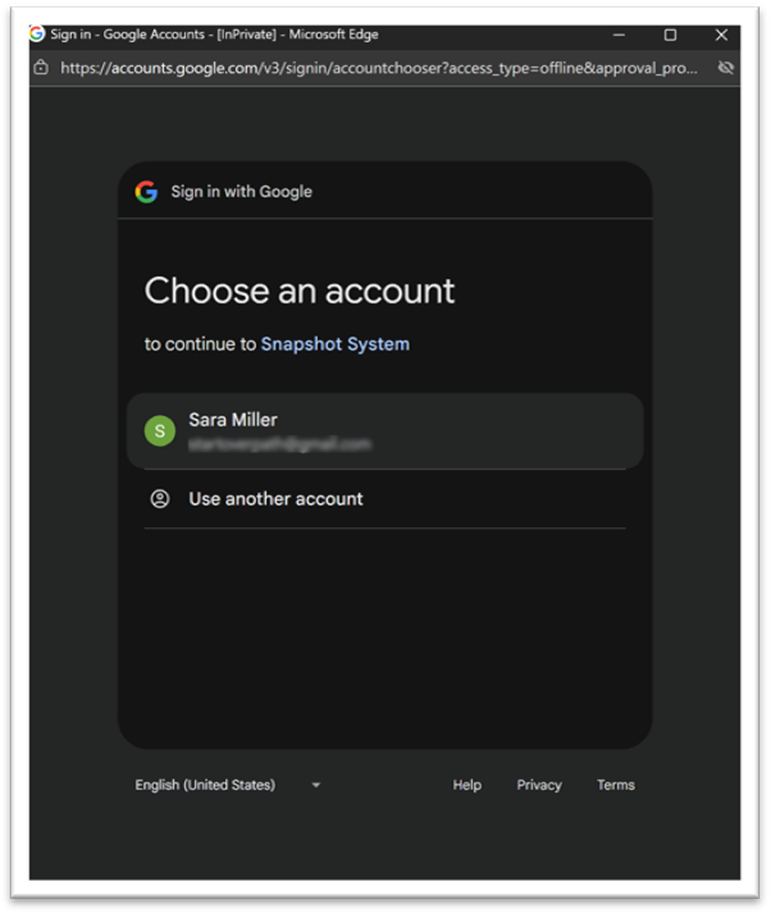
- Choose your account
- Click Advanced
- Click Go to Snapshot System (unsafe)
- Click Continue
- Click Select all → Continue
The custom Content Tools menu appears after authorization.
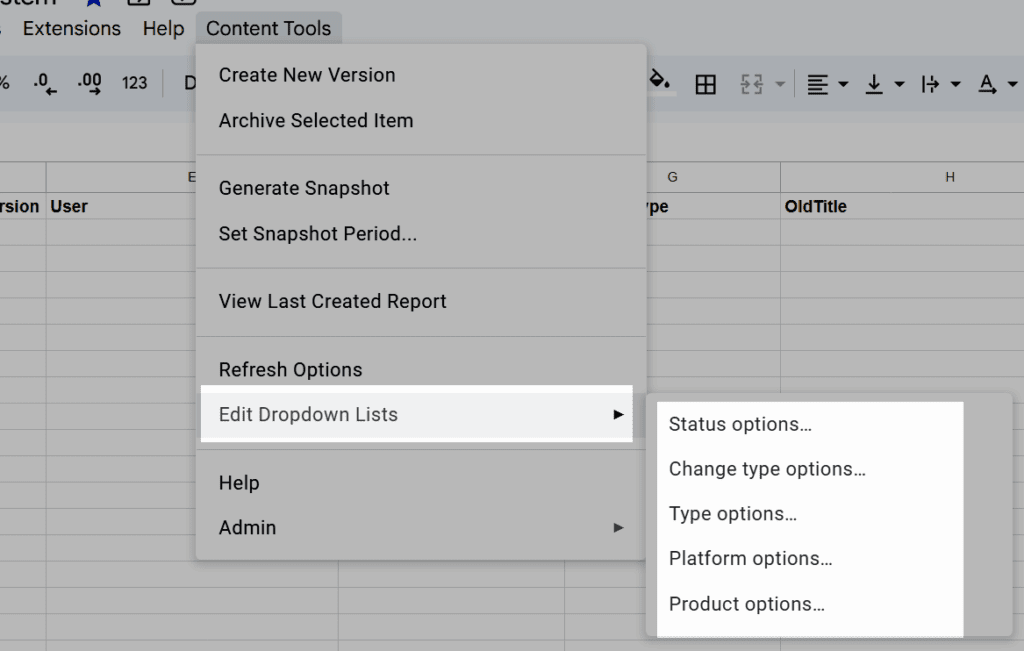
Step 6 — Configure Your Dropdown Lists (optional) #
If you want custom platform, type, status, product, or change type values:
- Content Tools → Edit Dropdown Lists
- Choose the list you want
- Enter values as a comma-separated list
- Click OK
You can skip this if the defaults work for you.


